Configurar apunte de horas en la categoría
Prerrequisitos
- Acceso al menú Configuración > Categoría (PL020).
- Categoría con la pestaña General configurada.
Introducción
El apunte de horas sirve para que los responsables informen el tiempo gastado en las acciones de la categoría, ya sean aisladas o de un plan.
Las configuraciones solo funcionarán correctamente si SoftExpert Control de actividades forma parte de las soluciones adquiridas por su organización.
Configurar el apunte de horas
1. Acceda al menú Configuración > Categoría (PL020).
2. Seleccione la categoría deseada y haga clic en el botón  .
.
3. Haga clic en la pestaña Apunte de horas.
4. Marque la opción Permitir apuntar horas.
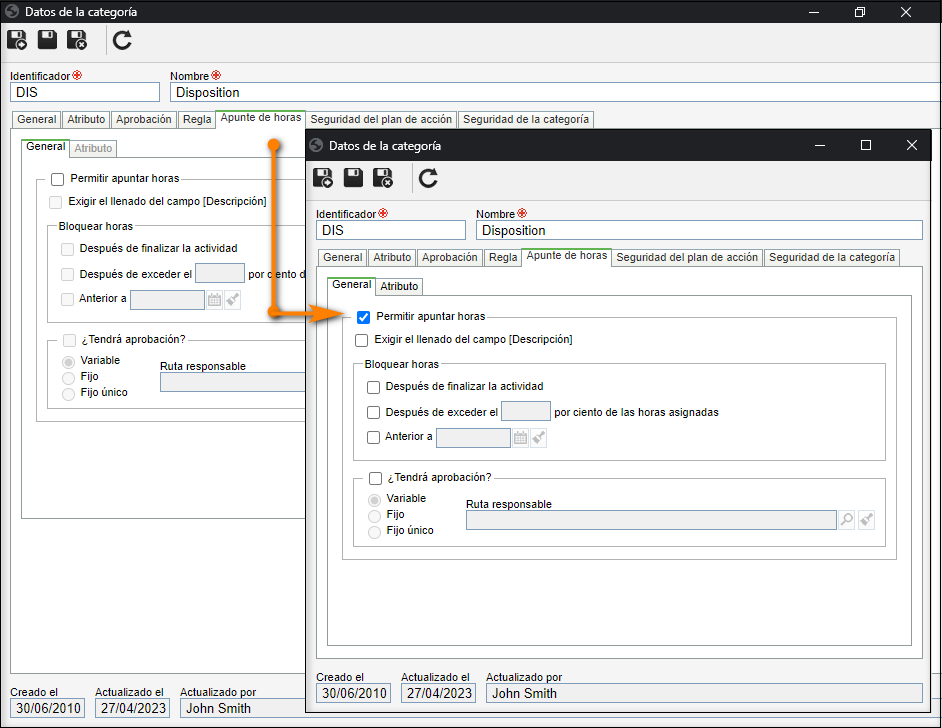
5. Enseguida, en la pestaña General, marque las opciones deseadas para definir cuándo el apunte de horas será bloqueado:
Opciones
| Aprobadas | Después de la aprobación de las horas apuntadas en las acciones, el apunte de horas será bloqueado. |
| Después de finalizar la actividad | Cuando las acciones sean finalizadas, el apunte de horas será bloqueado. |
| Después de sobrepasar un ___ por ciento de las horas planificadas | El apunte de horas será bloqueado cuando se exceda un porcentaje del total de horas asignadas (planificadas) a los recursos (responsables) en la actividad de proyecto. En el campo que quedará habilitado, informe el porcentaje de horas excedidas a partir del cual ocurrirá el bloqueo. |
| Anterior a | El apunte de horas en las acciones de esta categoría será bloqueado antes de una determinada fecha. En el campo que se habilitará, informe la fecha antes de la cual se bloqueará el apunte. |
| Exigir el llenado del campo [Descripción] | Al realizar el apunte de horas en las acciones de esta categoría, será obligatorio el llenado del campo Descripción. |
6. Si desea que las horas apuntadas en las acciones de la categoría pasen por aprobación, marque la opción ¿Tendrá aprobación?.
La aprobación del apunte de horas se realizará por medio de la tarea "Aprobación de apunte de horas", en el componente SoftExpert Control de Actividades.
7. A continuación, marque el tipo de ruta deseado y seleccione una ruta en el campo disponible. Para más detalles sobre los tipos de rutas y cómo configurarlos, consulte el artículo Configurar una ruta responsable.
8. Hecho eso, haga clic en el botón  de la pantalla principal.
Conclusión
Así, todo estará listo para que los planes de acción y acciones aisladas de la categoría incluyan los apuntes de horas.
Se podrán apuntar las horas por medio del menú Herramientas > Apunte de horas. En la pantalla de datos de una acción, será posible visualizar las configuraciones del apunte de horas de la acción por la sección Configuraciones > Apuntar horas y verificar los apuntes efectuados por la sección Configuraciones > Hora real.